Getting Started:
For anyone who has mapped using the Unreal Engine before you should be familiar with path nodes and how to use them. In Hell's Highway nav mesh has replaced the path node system. Nav mesh tells the AI where they can and can't run. Any place you lay down nav mesh your squad and the Germans will be able to access. Don't place nav mesh through or under static mehses or the AI will have trouble navigating that area and will likely try and run straight through the static mesh ( Only place nav mesh under other static meshes if its a half height wall or object you want them to be able to jump over).
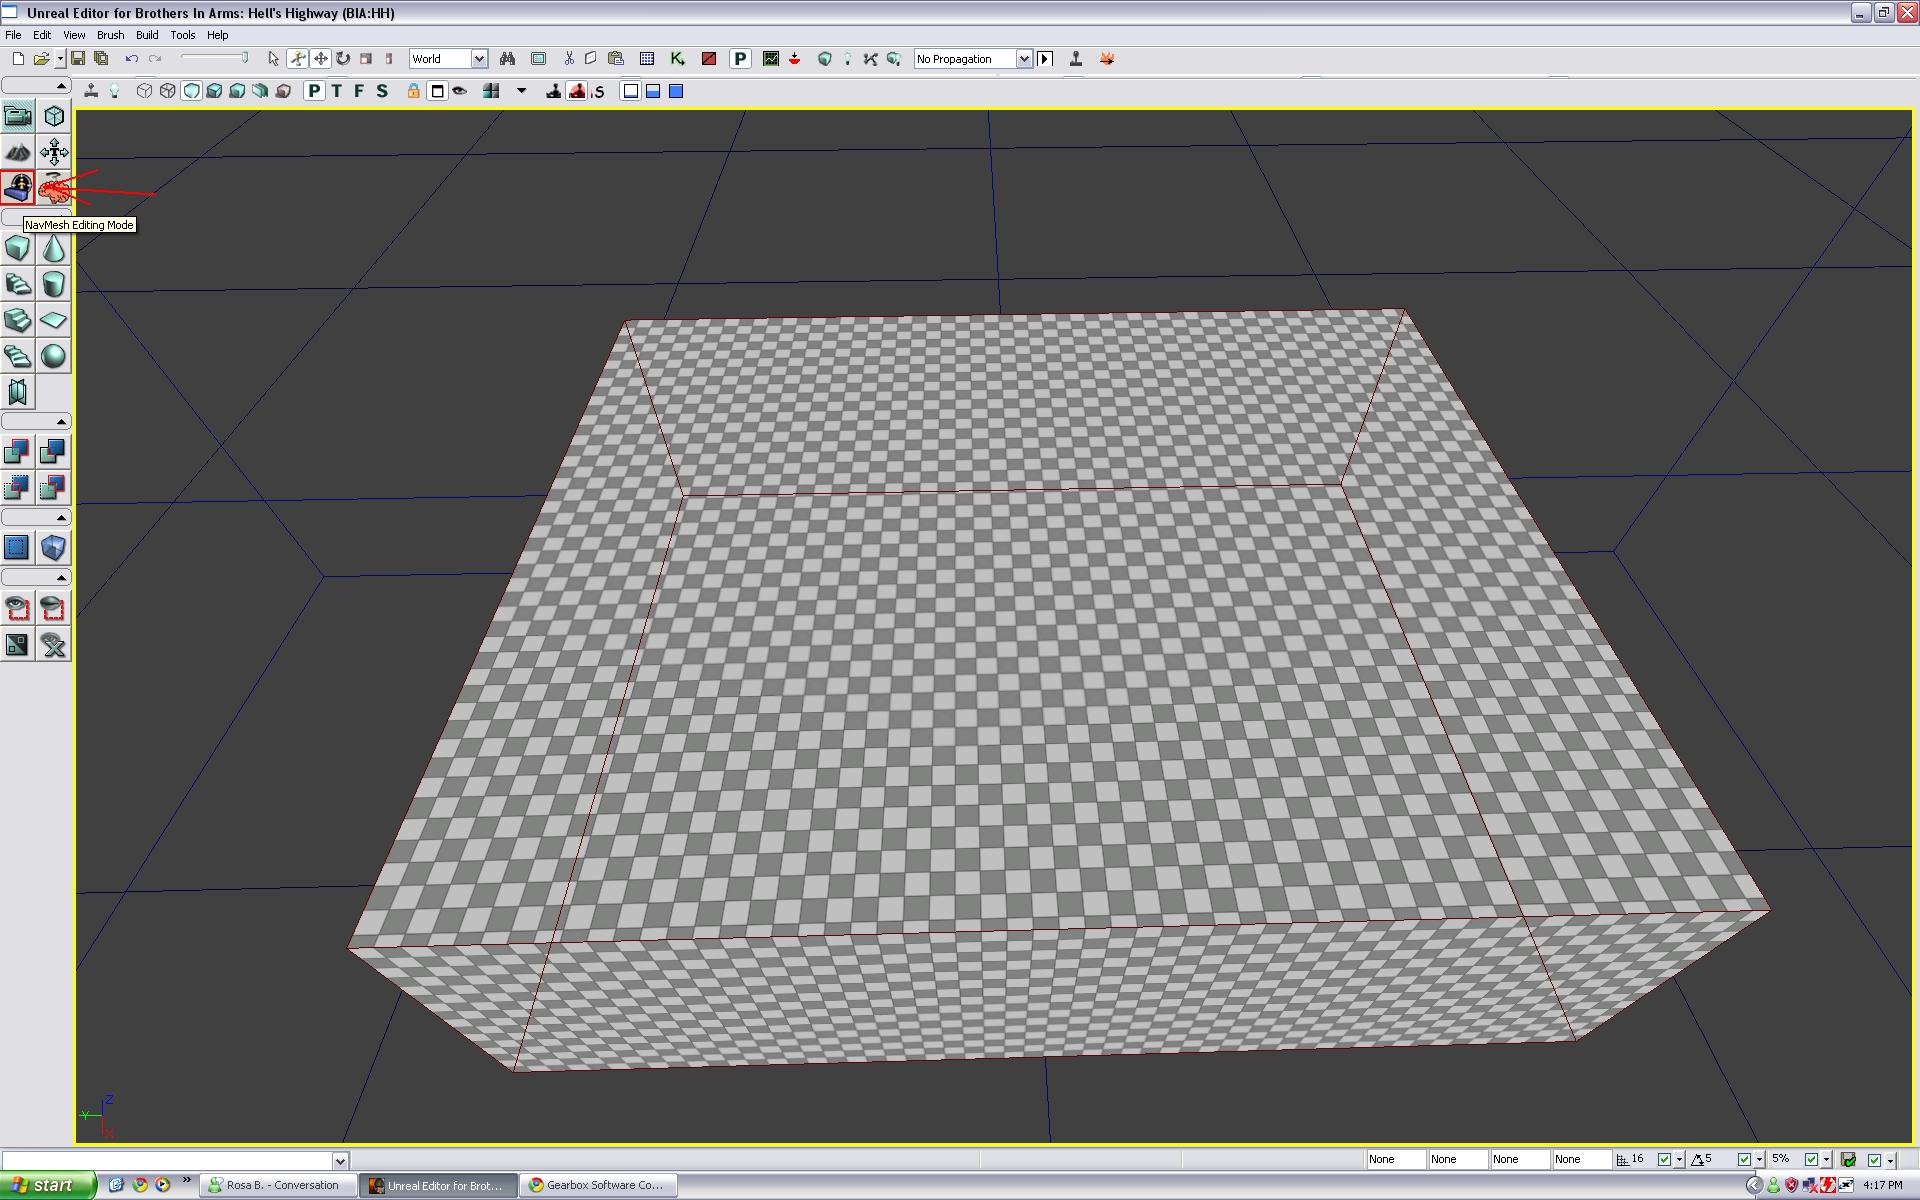
The Nav mesh tool can be found in the tool bar to the left.
Terrain Trace Only - If you are placing nav mesh over top anything but a terrain you will probably want this option unchecked or it may place your nav mesh well below your mesh or BSP your trying to place it upon.
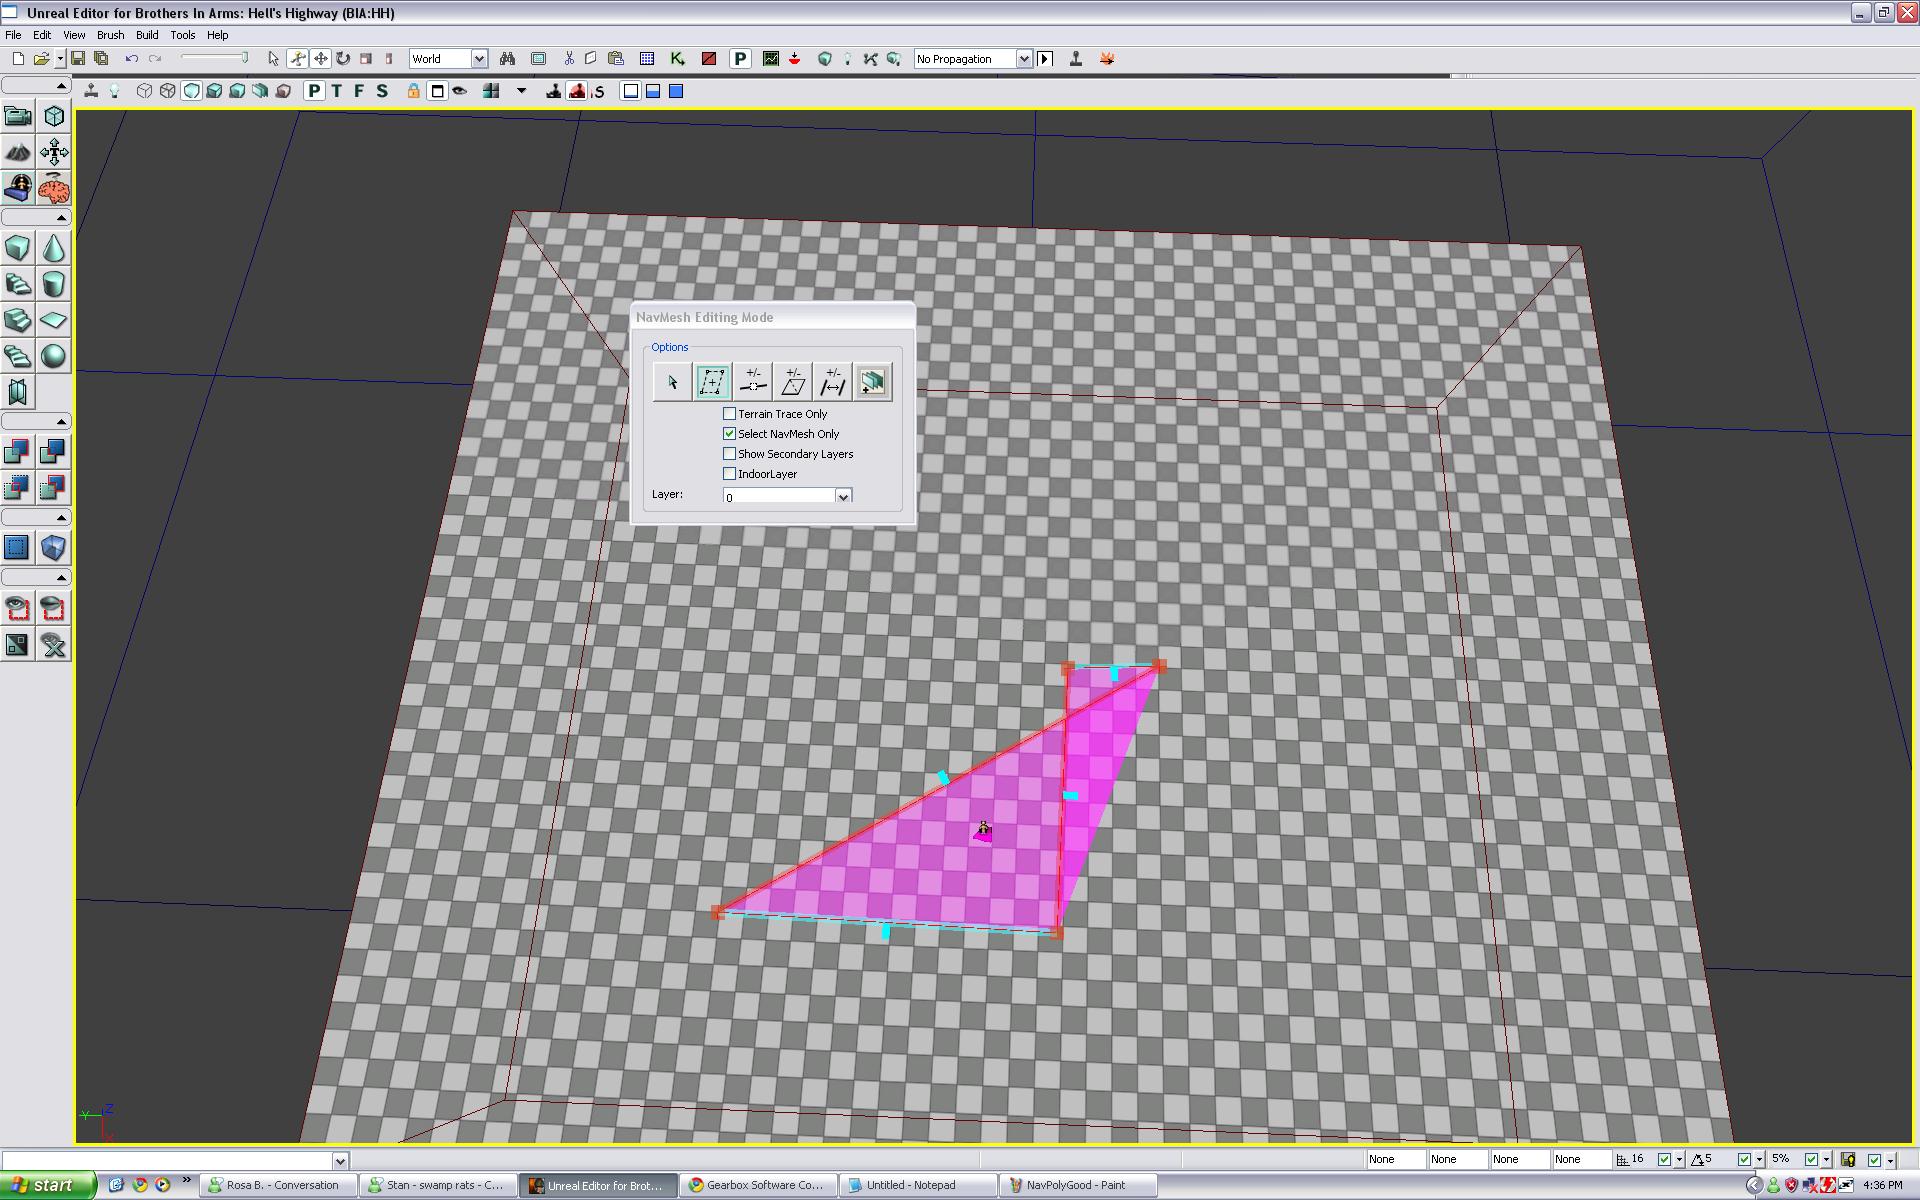
Several times in this tutorial I will talk about nav mesh polys, and vertices. Just to make things clear, the nav mesh vertex\vertices will be the little red squares with the plus in them. The nav mesh poly is the big pink object that appears when you connect all the vertices. Nav mesh edges are the light blue lines that connect the vertices.
Tools:
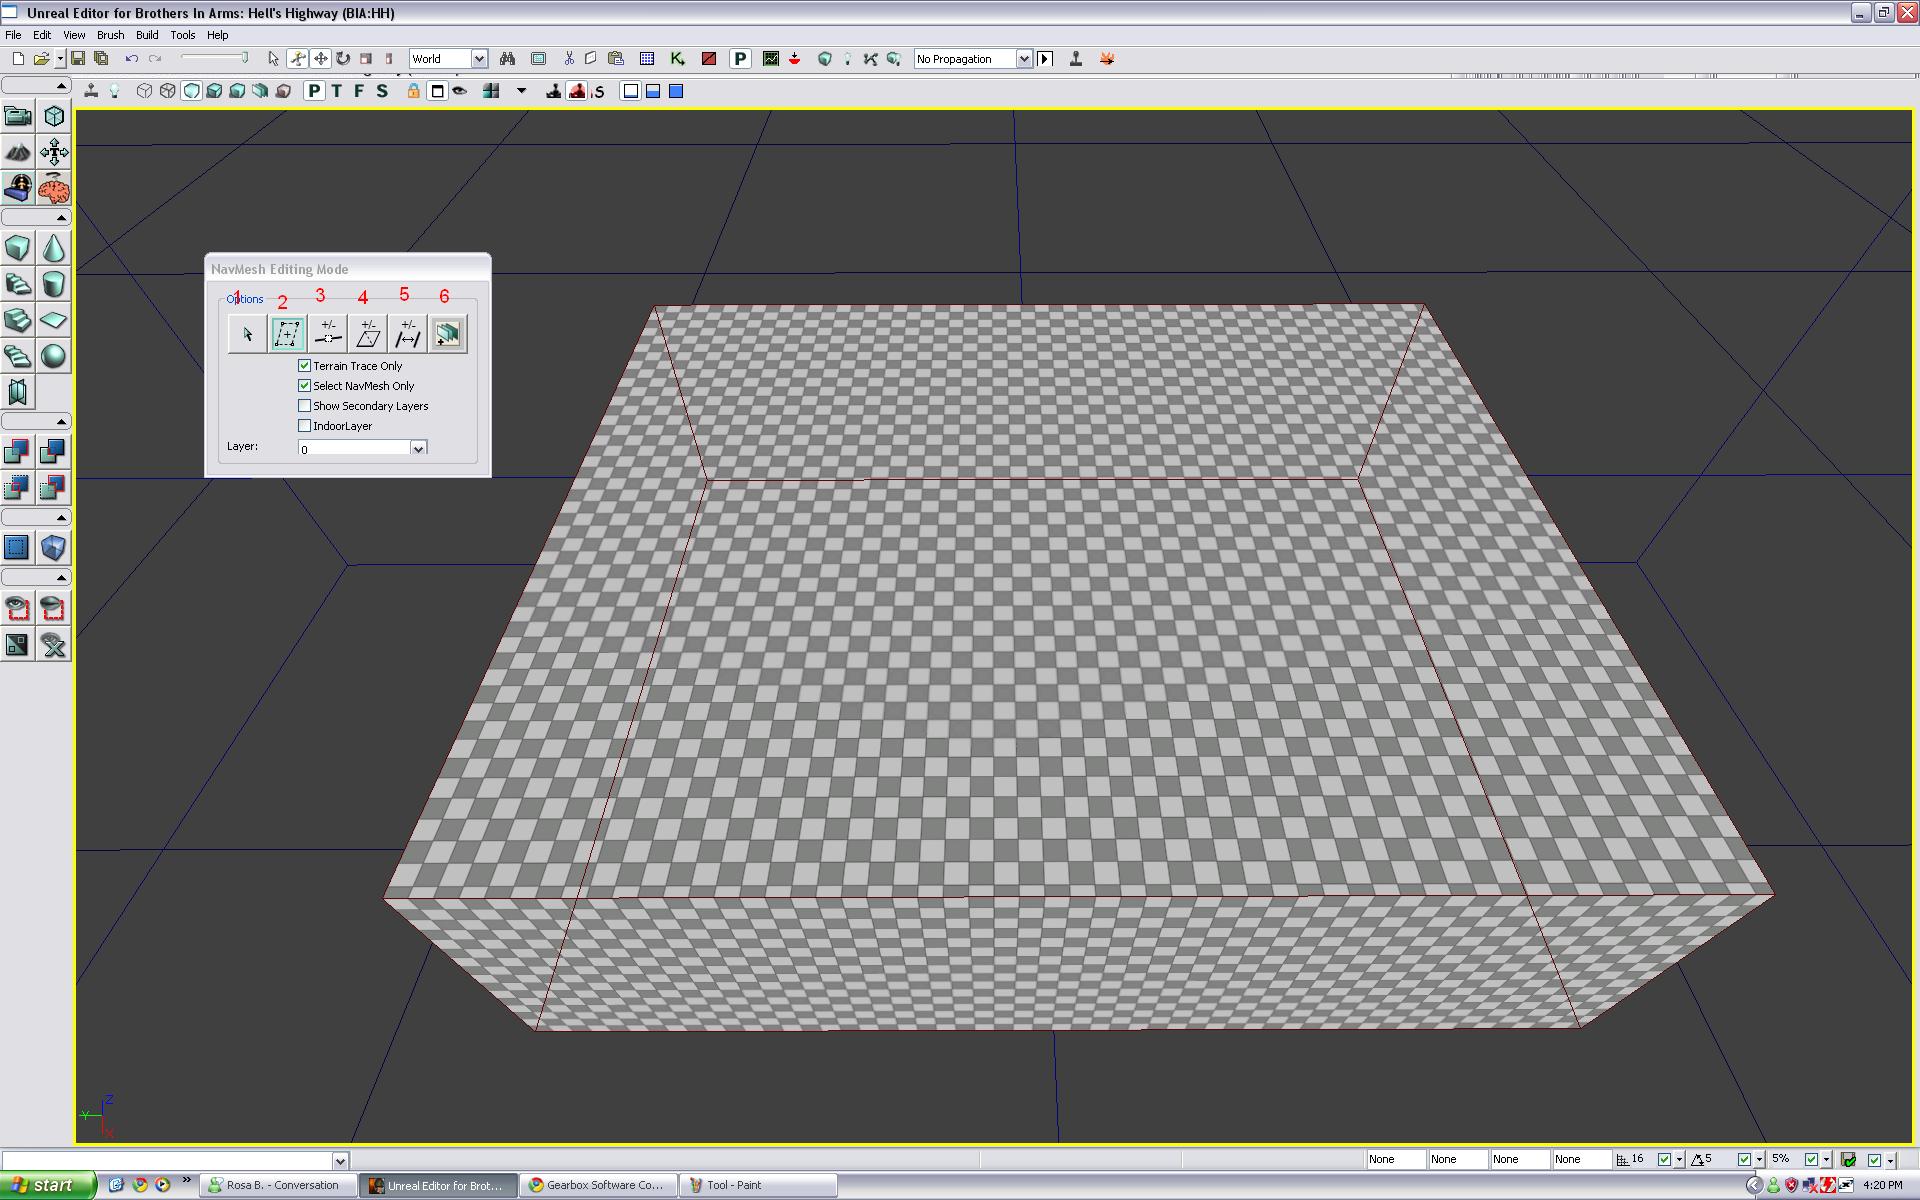
1. Use this tool to move the nav mesh vertices around.
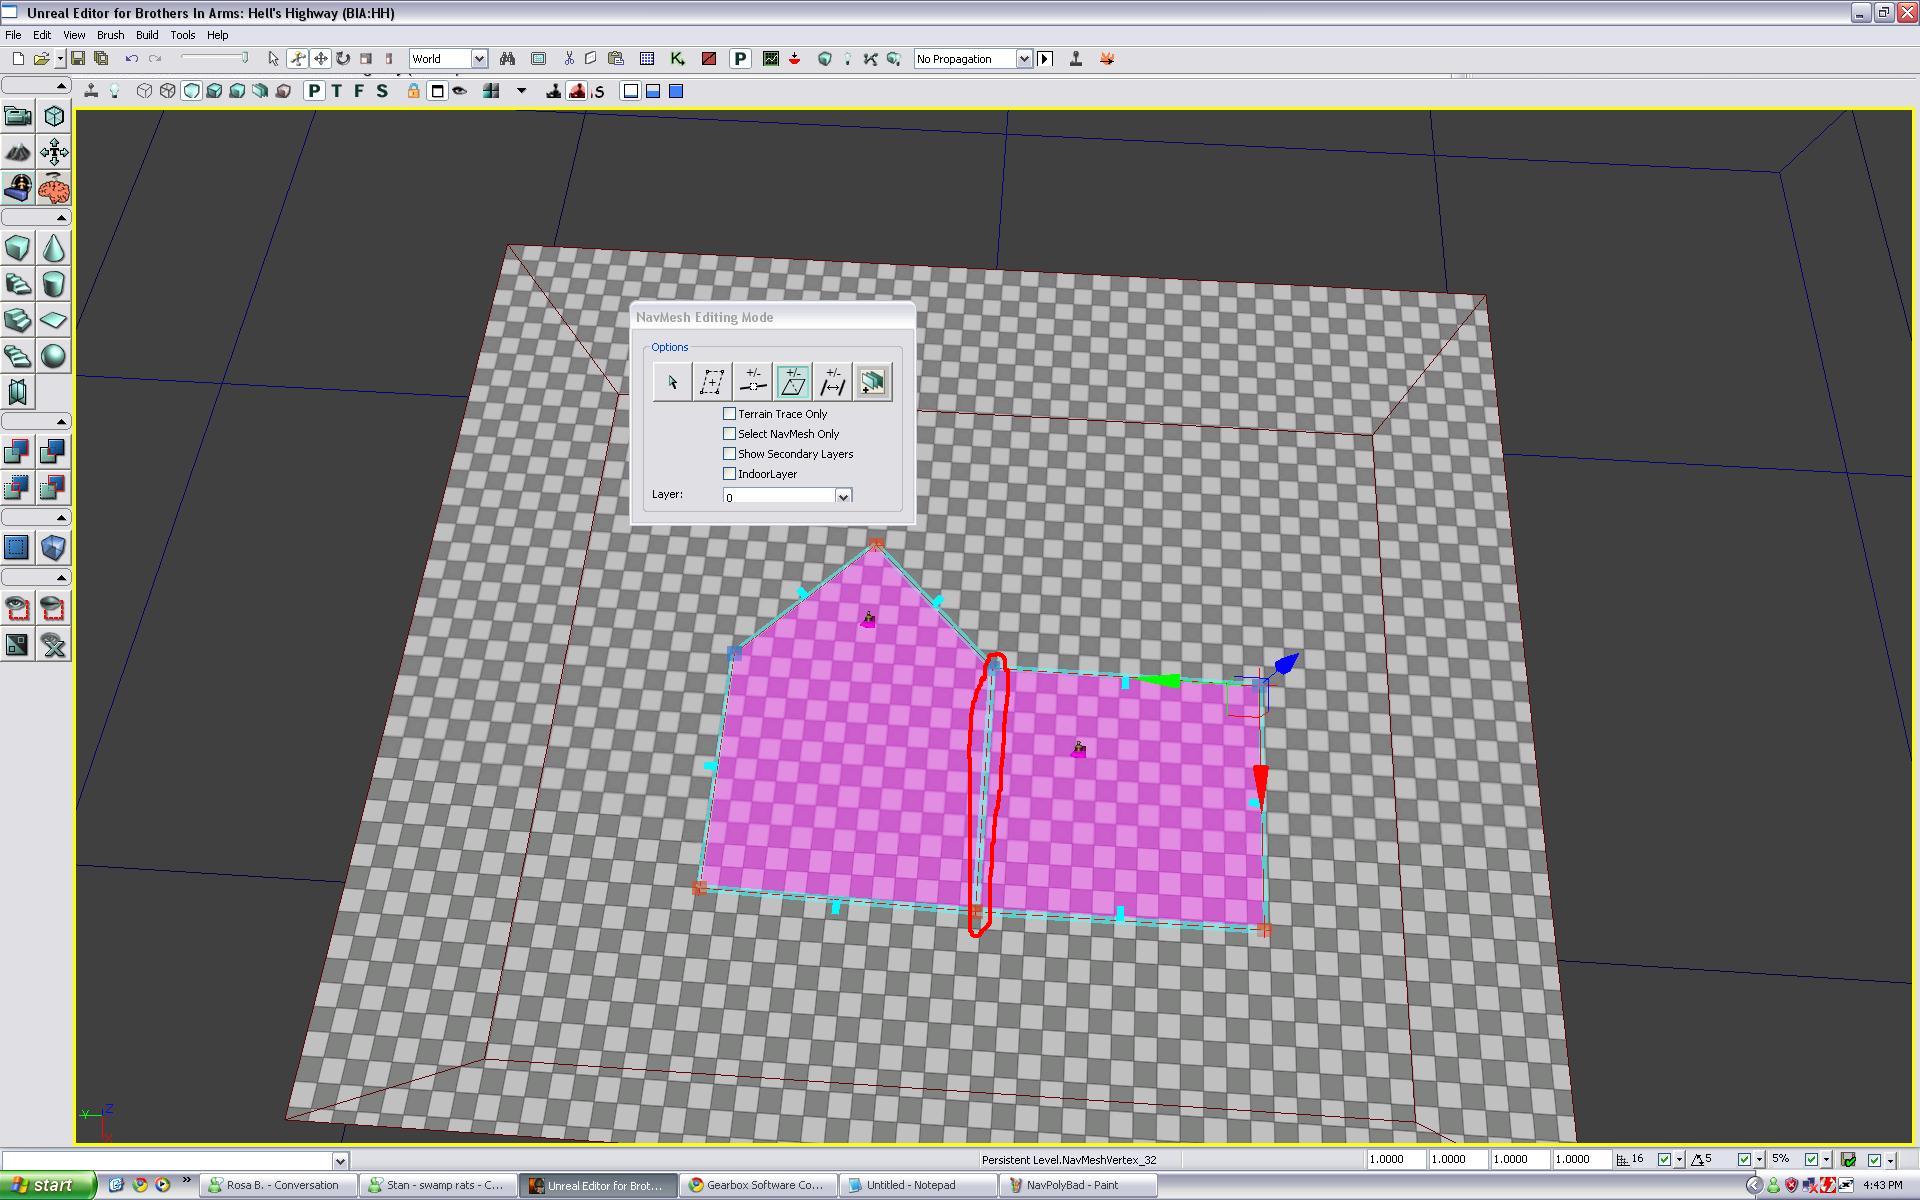
2. Use this tool to create your nav mesh. Hold Control and using the left mouse button will place the nav mesh vertices. Place 3 nav mesh vertices then hold control and press the right mouse button on top of the first vertex you placed. If you did it correctly you should get a pink box. Below are two pictures of how a good shape is made and how a bad ones is made. You can't criss cross the verts or it will show up like the bad one.
Good:
 Bad:
Bad:
3. This tool can be used to merge two Nav Mesh vertices or to split the edge of the nav mesh poly. To merge two nav mesh vertices click one vertex, hold control and left click another vertex. It will join your two vertices into one. To split a nav mesh poly hold control and right click anywhere on the blue line that connects your nav mesh vertices and it will add a new vertex there.
4. This tool is useful for splitting one nav mesh poly into two or joining two nav mesh polys into one. To combine two nav mesh polys into one hold control and left click the nav mesh edge that seperates the two navmesh polys and they will be joined into one.
Now if you want to seperate it again you can hold control and right click each vertex that was at the end of the blue lines and it should make them two seperate polys again.

5. Not entirely sure what this tool is used for as I never actually had to use it at any point. My guess is that it has something to do with linking the nav mesh in one level with the nav mesh to another sublevel. Although there are other methods to do this.
6. This tool is only really useful for if you are placing nav mesh above nav mesh in another part of your world. For example if you had a two story building and the bottom floor was nav meshed and youd want to have the top floor nav meshed as well you would make a new layer and have the top floor layer 1 while the bottom floor was layer 0.
Setting up Cover:
Place an object into your level that you'd like your squad or the Germans to take cover on. For my demonstration I used the side of a building. First thing you need to do is set the nav mesh up to fit the mesh your wanting to take cover at. To do so place one nav mesh vertex at each end of the mesh so that the nav mesh edge goes along the edge of the mesh.
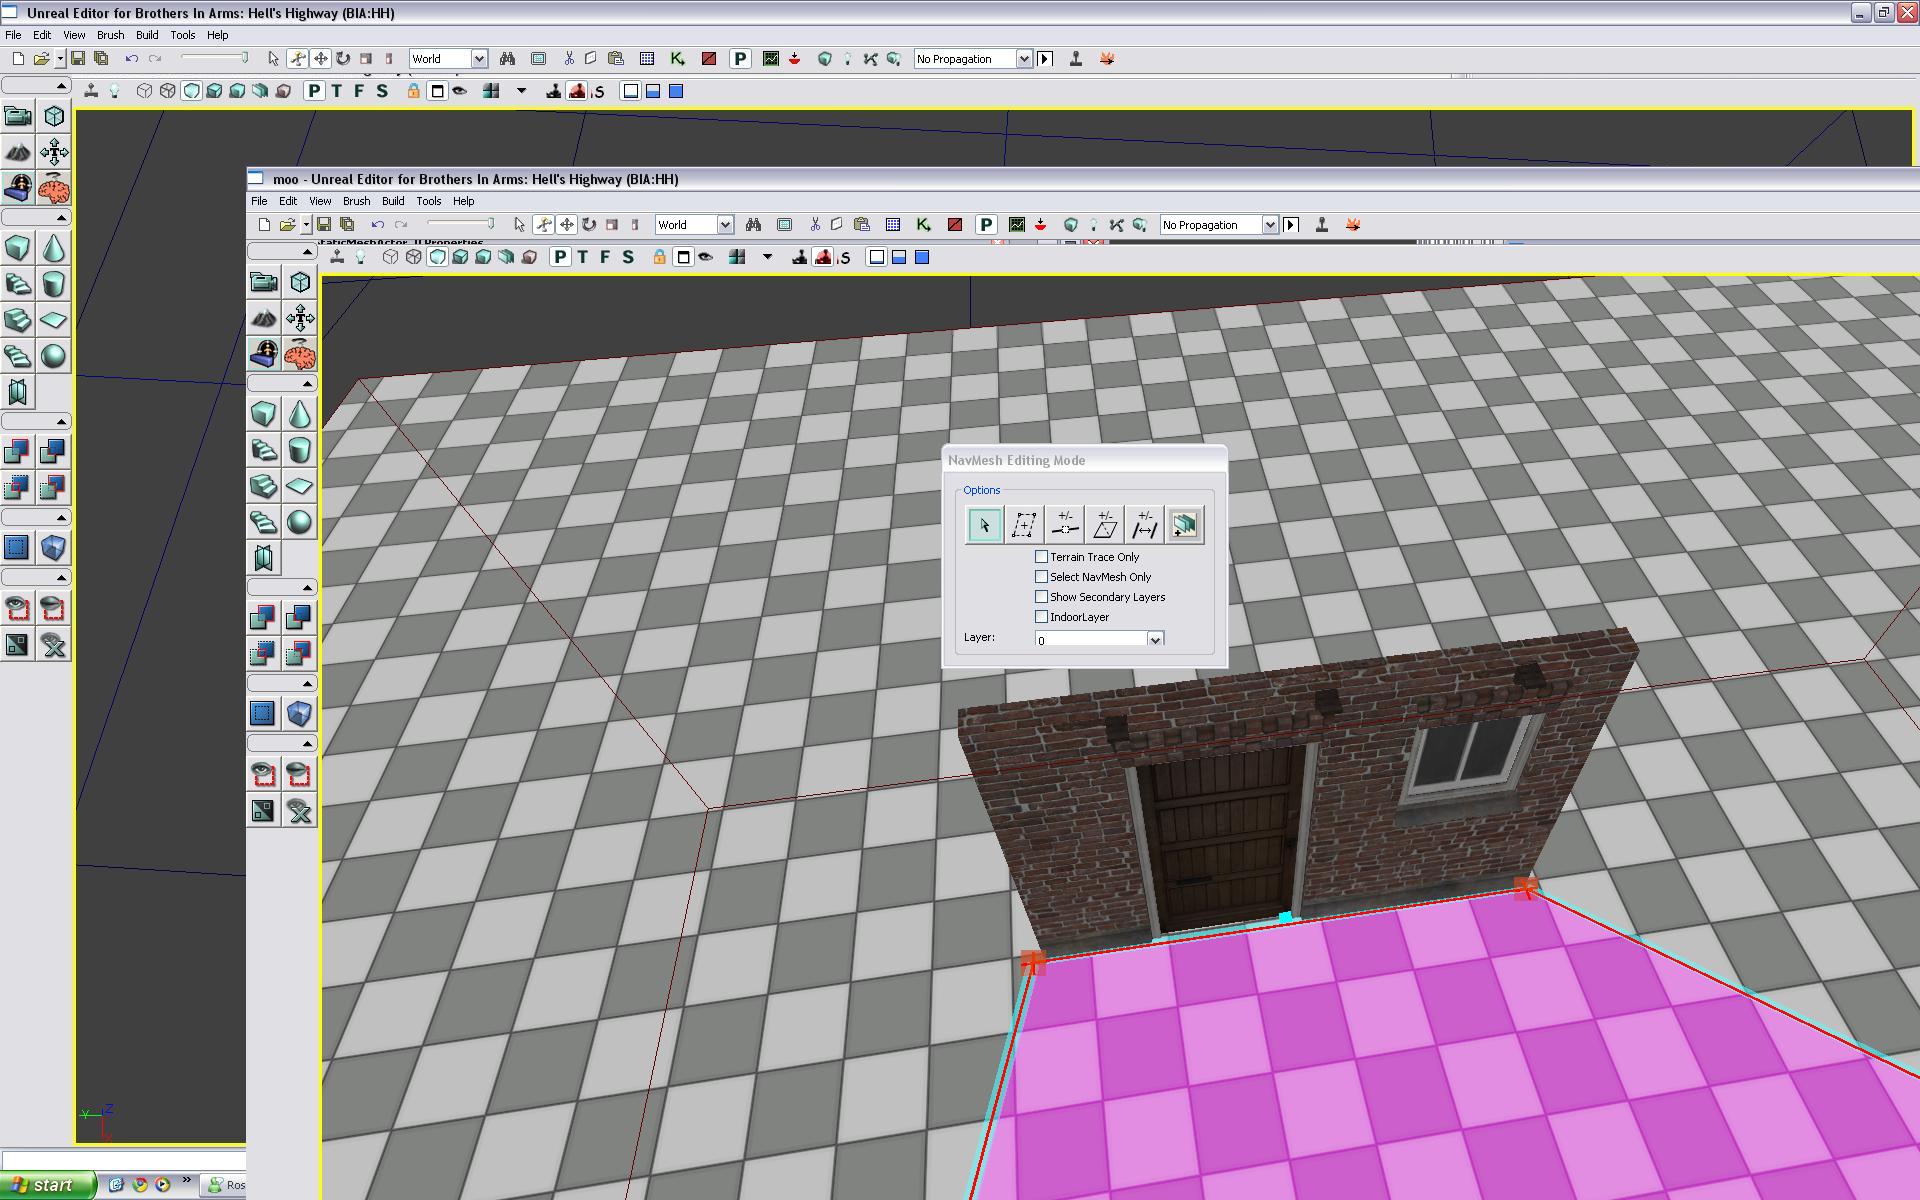
Next check to see if the normal is facing the right direction. The normal is a little light blue flag like object that is sticking out all the nav mesh edges. If you want to take cover on an object you have to make sure that this little flag is facing towards the mesh.
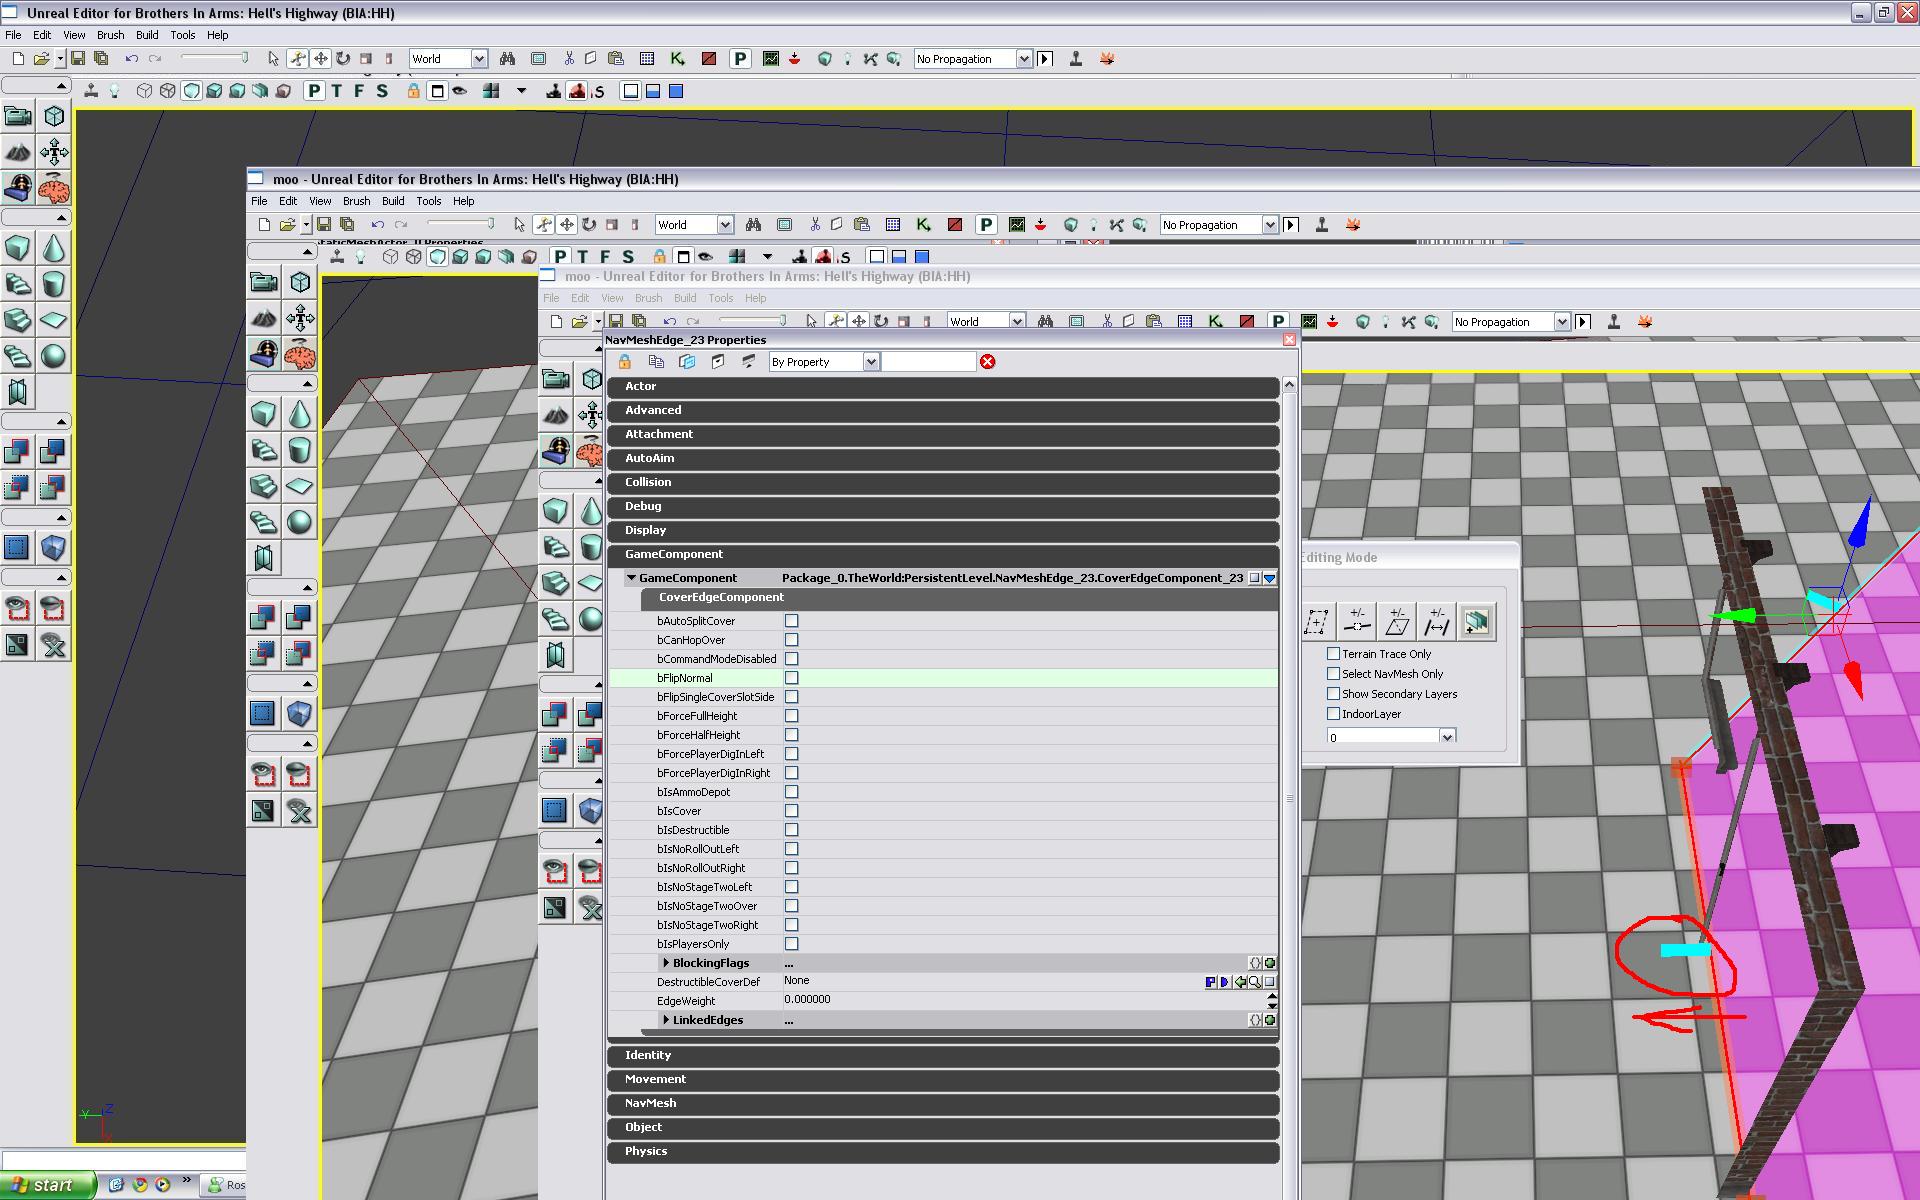
If its not then you can change it in the properties by putting a check next to flip normal (Under GameComponent). If you don't have this flag facing the right way you will get some pretty odd things happen when trying to use this wall for cover. Once the properties are opened for your nav mesh edge put a check next to bIsCover. Once you check this your nav mesh edge will turn purple indicating that it is used for cover.
 Setting up destructible cover and wall jumps:
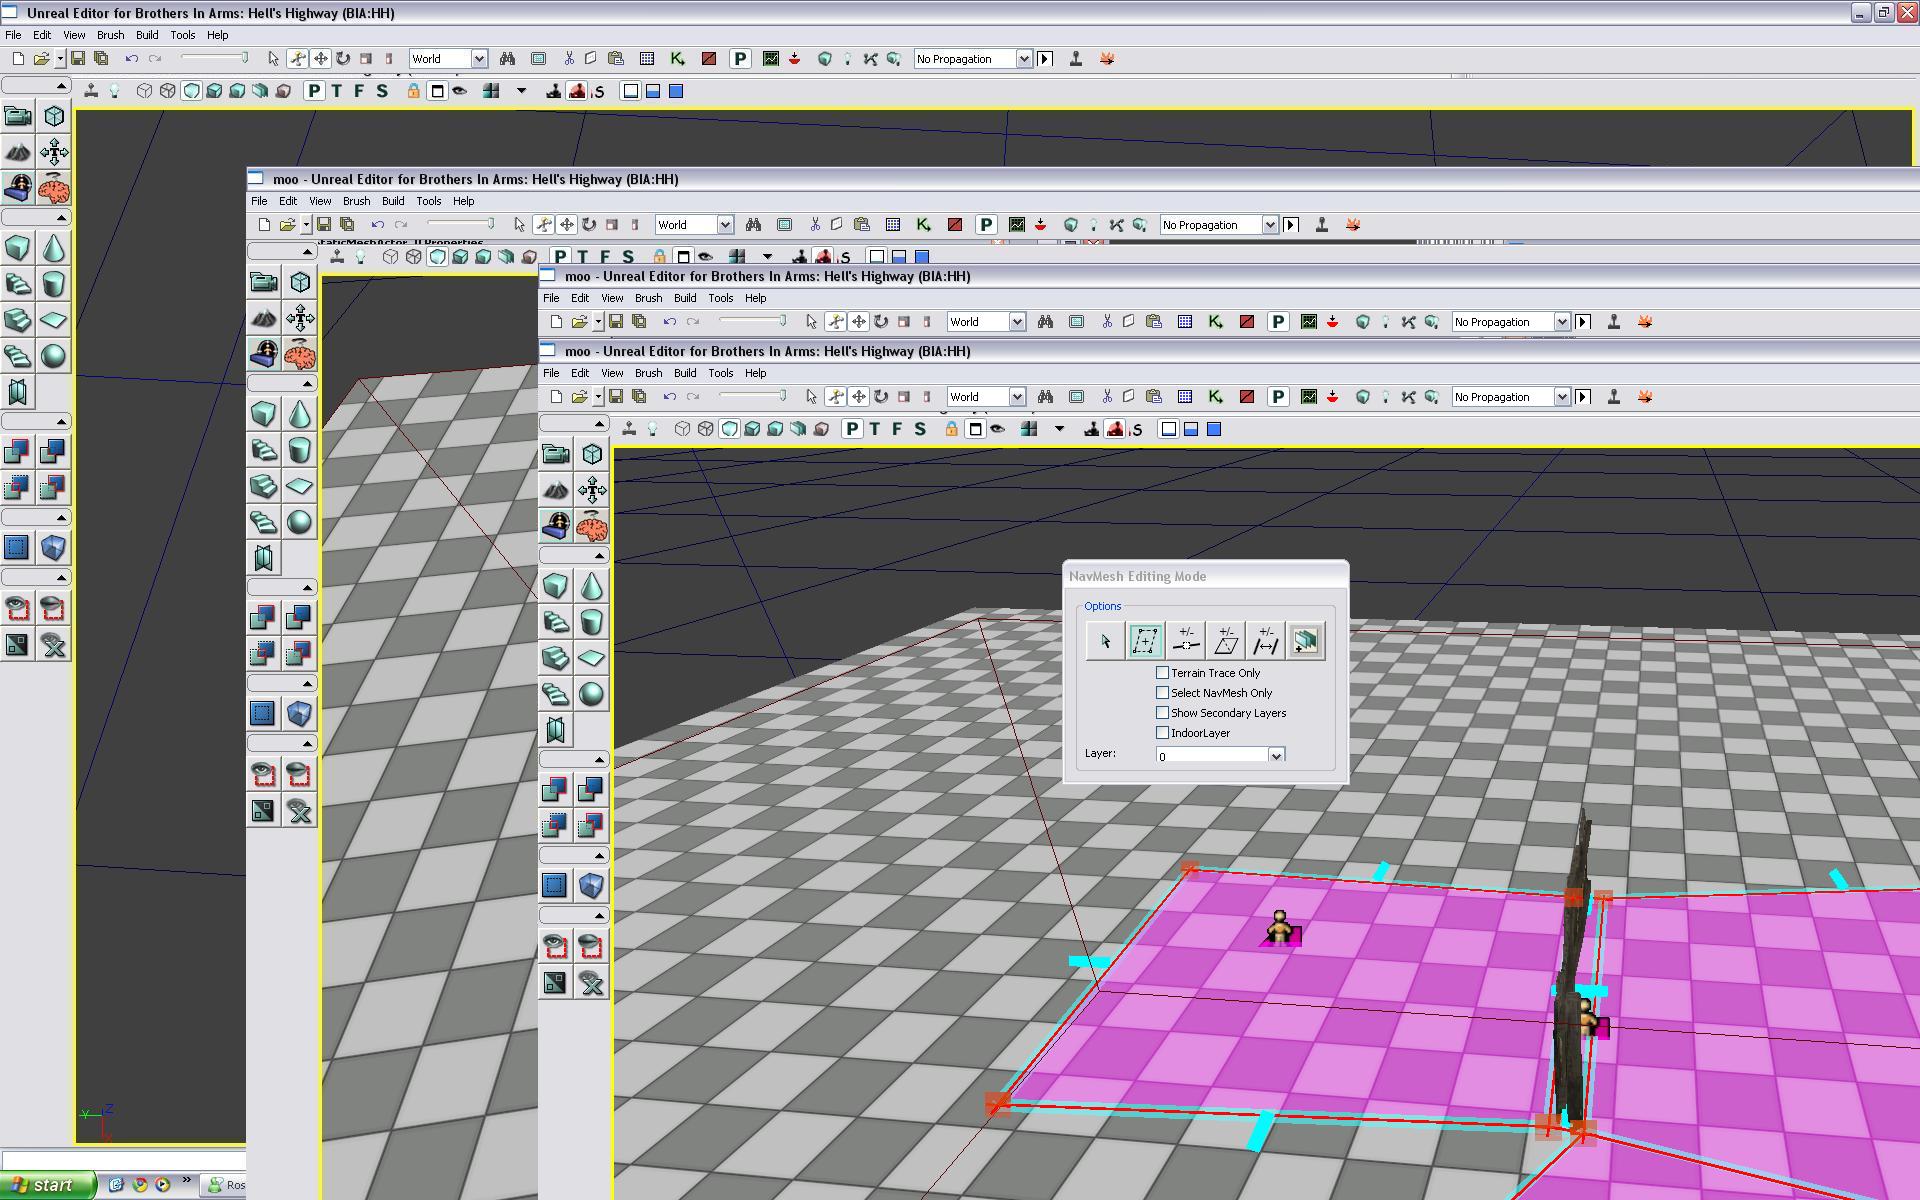
For destructible cover you can't use normal static meshes, you need to place prefabs. To find some good ones open the package P_Fence go under Prefabs and use dc_rural_fence. Place that in your level. Just like with the wall cover I set up before make sure that the nav mesh is lined up correctly with the fence, but this time make sure that it is lined up on both sides and that there is a nav mesh poly under the fence like in the picture. Also make sure that there is a poly on the other side of the fence as well. As before make sure that the normal flags on both sides are facing inwards towards the fence.
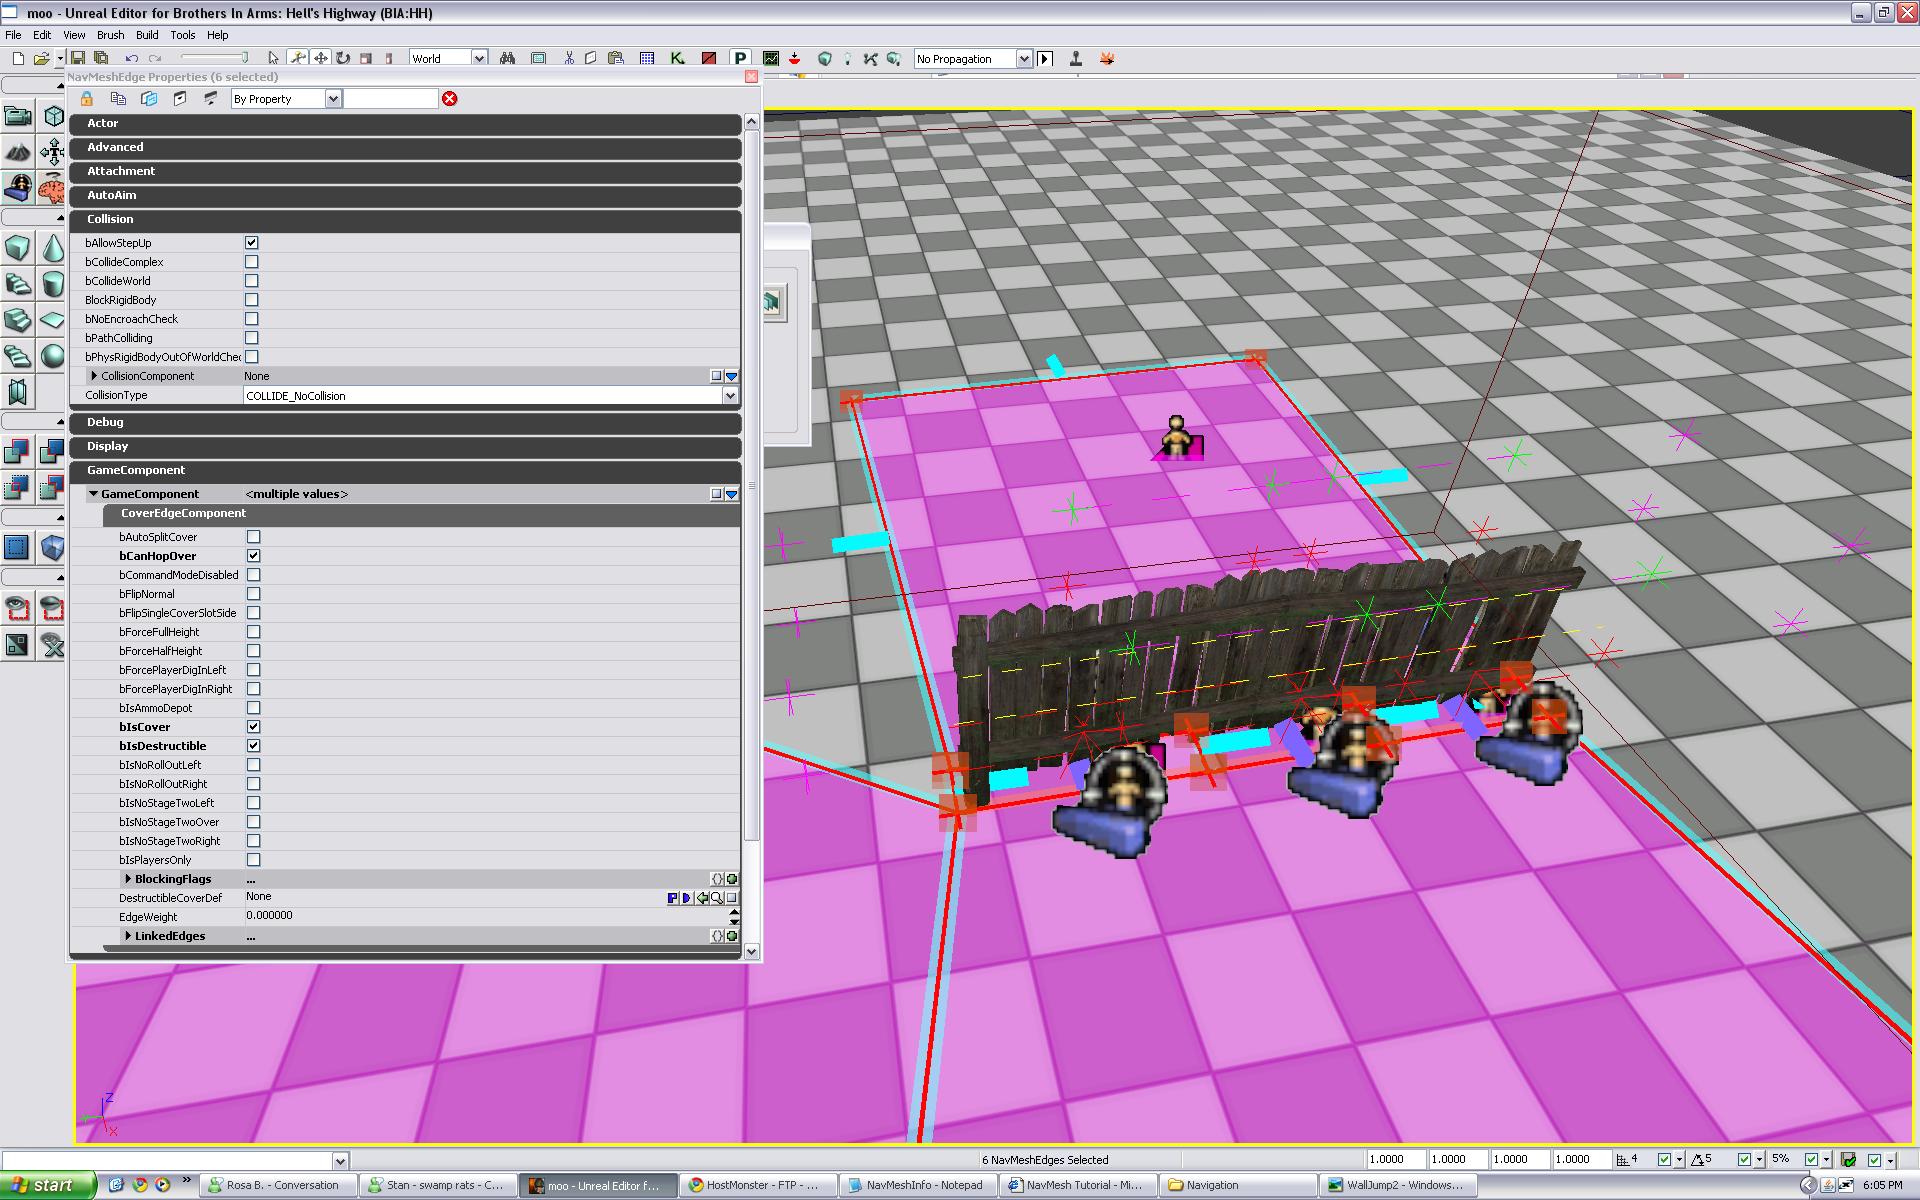
Now open the properties to the two nav mesh edges on both sides of the fence and check bCanHopOver, bIsCover, and bIsDestructible. If set up correctly you should be able to jump over the fence, destroy the fence, and take cover on the fence. You should also check bAutoSplitCover when using destructible fences. If you tick this option it will split your nav mesh edge into several smaller ones when you rebuild the navigation.
 Other properties:
There are a few other properties for the nav mesh edges I didn't explain. I'll only explain a few of them here.
bForceFullHeight: This option is useful when you want to force the player to take cover standing up
bForceHalfHeight: This option is useful for forcing the player to take cover in a kneeling position.
bForcePlayerDigInLeft\Right: These two options usually shouldn't be touched. Good example of a time to use it. You have a doorway where you want the player to take cover at the edge of it and you want to force the player to take cover and face towards the door way you can tick these options to make him face the way you want when he takes cover there.
bCommandModeDisabled: This option is used on all nav mesh edges inside buildings or under roofs accross Hell's Highway. It disables command mode and is useful for indoor areas to keep the players camera from going through the ceilings. Will only be used when the player is taking cover at a nav mesh edge with this option ticked.
bIsPlayersOnly: This option makes the nav mesh edge only usable by the player. Your squad as well as the Germans will ignore any nav mesh edge you put this option on.
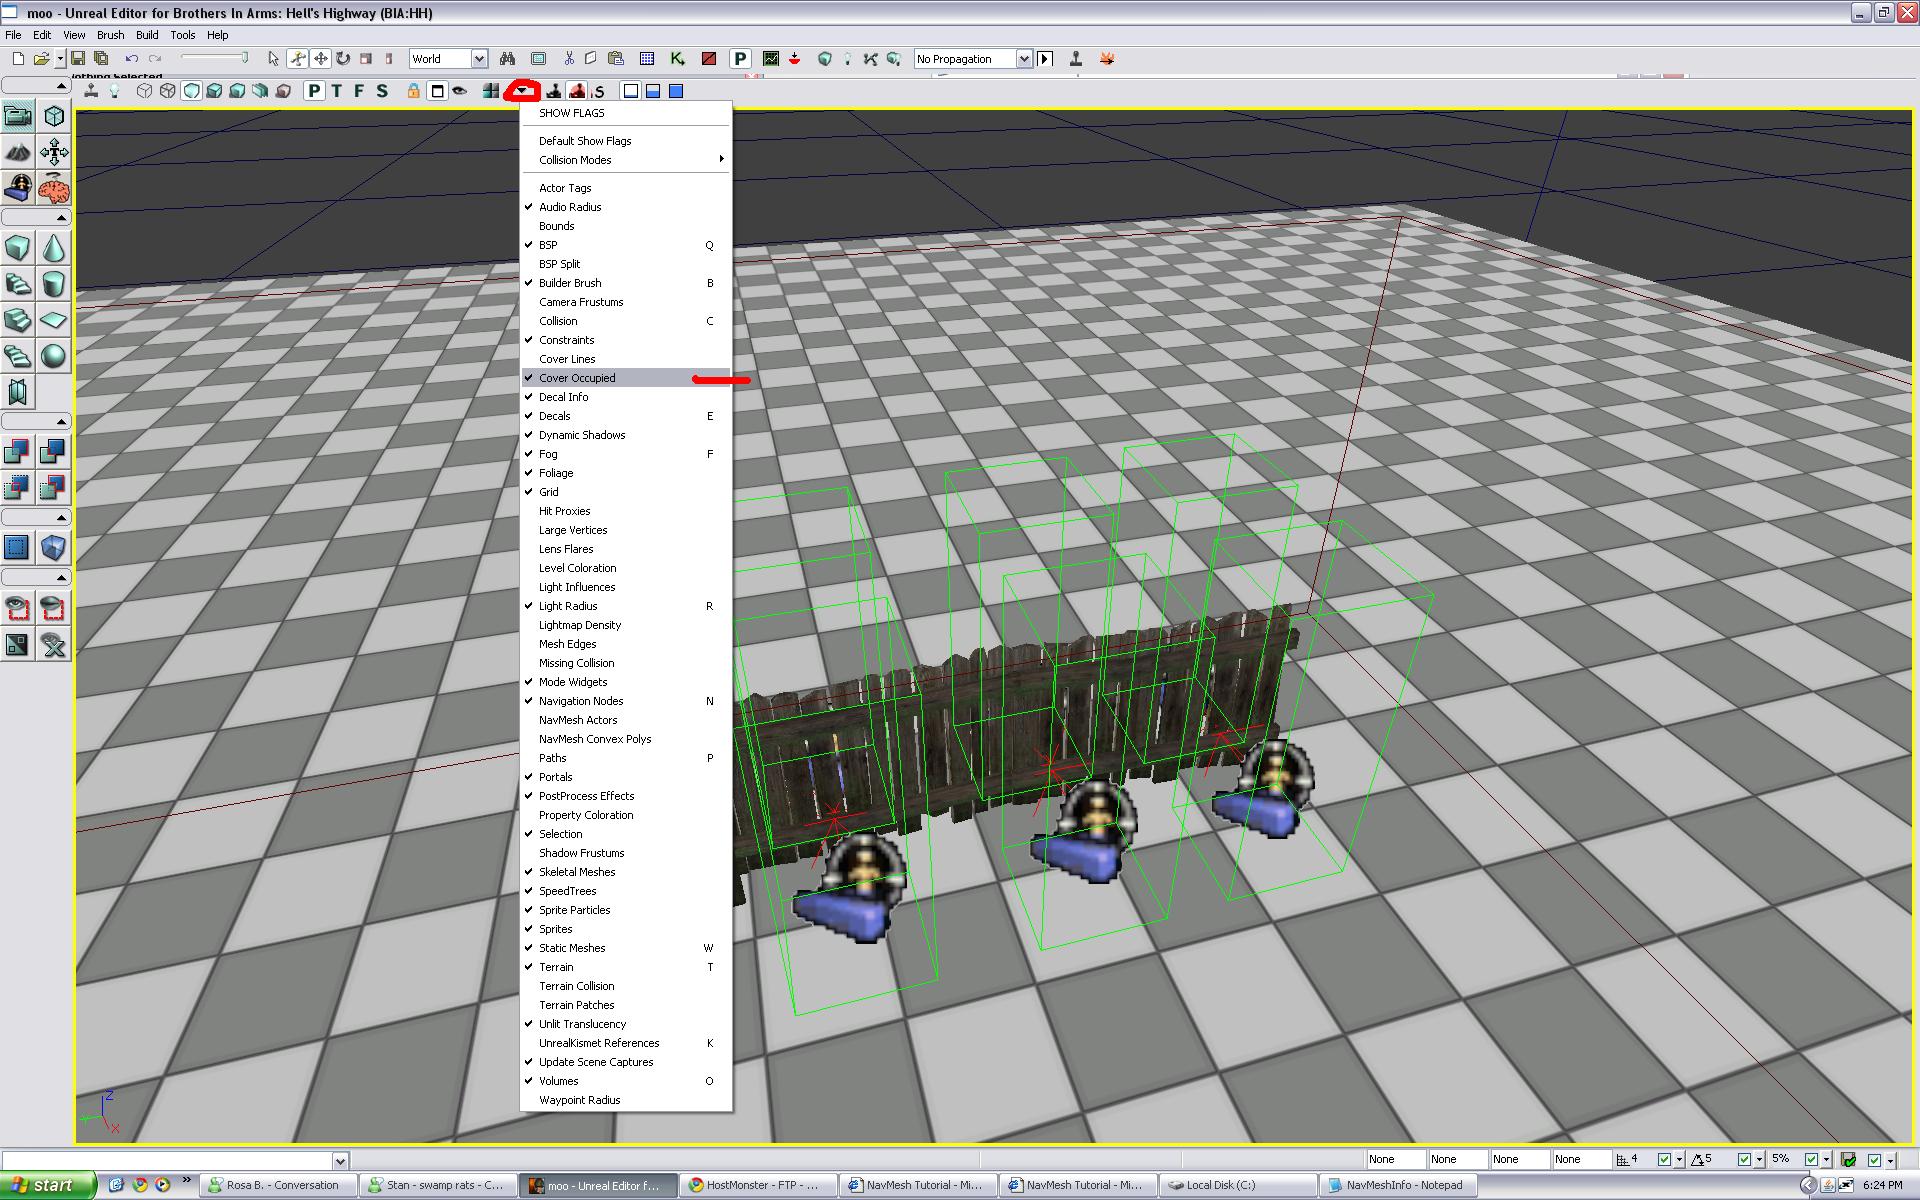
Cover Occupied:
Enabling the view of Cover Occupied is useful for when you need to know how many AI can fit on a piece of cover. Once you have this option ticked to show cover slots a bunch of green boxes will appear along cover areas. If there are 8 boxes along side your cover that means 8 AI will be able to take cover on that object. Look at picture to see how to enable it.
If you have any questions or if anything within this tutorial is unclear feel free to email me at
evilmrfrank@yahoo.com